What are Containers?
So there is a huge similarity at face value between Containers and Virtual Machines and they can both be used for similar purposes. They are however completely different technologies with different strengths and weak...
What are Containers?
So there is a huge similarity at face value between Containers and Virtual Machines and they can both be used for similar purposes. They are however completely different technologies with different strengths and weaknesses.Virtual Machines
Are literally just that. They partition off resources within your machine and run a complete / alternate operating System within that partition, whether it be Linux or something else. The main feature here is that you can run any (supported) Operating System, not just Linux, and it runs a completely different Operating System kernel to whatever is running on the host computer. The downside is that you end up running multiple OS kernel’s in parallel, which can be a drain on the system in terms of memory and additional processes.Containers
Are a mechanism supported by the Linux kernel that allow soft partitions between resources in such a way that you can run what look like different OS kernel’s in dedicated areas of shared disk, but are in fact just processes under a single Linux Kernel. So whereas all containers will be running under the SAME instance of the Linux Kernel (so there is no scope for running different versions of Linux or other Operating Systems) it does mean that containers are very light-weight. (so you can run lots with very little overhead)What are they good for?
- Virtual Machines - running different versions of Linux, running different Operating Systems, anything that required hard partitions between host resources and resources available to the virtual system.
- Containers - running different (partitioned) applications under one instance of the Linux Kernel with soft partitions between resources.
Technologies
There are a number of different technologies which use the containerisation feature of the Linux kernel, probably the most well-known is docker. This has become the goto for developers who want to deploy their applications inside a ‘known’ good Linux environment. An application container will include a complete file-system tree containing all dependencies (libraries etc) required for the application to run. This means it’s relatively in-sensitive to the specific kernel the host is running, but on the other hand it includes lots of things that might already exist on the host that it really doesn’t need. Whereas this could be considered a feature from a security perspective, because the entire application and all dependencies are a known quantity, historically I think that this feature would have been referred to as bloatware. Other instances include things like snaps and flatpak, both also typically used for distributing software. snap for example has been standard on Ubuntu for some time and if you do;sudo snap list
Running with LXD
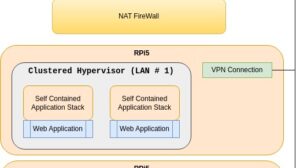
My example is going to utilise a project called LXD, which is one of the few not aimed at application packaging, but rather as competition for Virtual Machines.My Target
I’m starting with a clean machine with 4GB of RAM and 150Gb of disk space, here in the Office, behing a NAT / broadband firewall. My aim is to be able to efficiently split the machine into containers such that I can run a dedicated private WordPress instance in each container and make each WordPress instance available on the Internet under it’s own unique domain name.Setting up my Storage
So the first thing I’ll mention is that I’m working as root. If you wish to do this as a user, then all commands will need to be prefixed with sudo. When I prefix a $ before a command, this is to indicate a root prompt and it doesn’t form a part of the command. The first thing I’m going to do is to check I have some storage ready for use by LXD. At the moment I have a 150Gb disk that’s partitioned off with a root filesystem, some swap space, the rest as empty space that I can allocate to LXD.$ fdisk -l /dev/vda
Disk /dev/vda: 150 GiB, 161061273600 bytes, 314572800 sectors
Device Start End Sectors Size Type
/dev/vda1 2048 4095 2048 1M BIOS boot
/dev/vda2 4096 41947135 41943040 20G Linux filesystem
/dev/vda3 41947136 50335743 8388608 4G Linux swap
/dev/vda4 50335744 314570751 264235008 126G Linux filesystem
Installing LXD
The next thing, just to make life interesting, under Ubuntu the lxd software is actually packaged using snap, so the container software comes, and will run in, a container. I guess this is an example of what developers refer to as ‘eating their own dogfood’. So to install LXD we need;$ snap install lxd
2023-09-22T11:25:42Z INFO Waiting for automatic snapd restart...
lxd 5.17-e5ead86 from Canonical✓ installed
- Storage, I’m going to ask for LVM on disk partition /dev/vda4
- Visibility, make LXD available over the network so I can configure using my browser
$ lxd init
Would you like to use LXD clustering? (yes/no) [default=no]:
Do you want to configure a new storage pool? (yes/no) [default=yes]:
Name of the new storage pool [default=default]:
Name of the storage backend to use (btrfs, ceph, dir, lvm, zfs) [default=zfs]: lvm
Create a new LVM pool? (yes/no) [default=yes]:
Would you like to use an existing empty block device (e.g. a disk or partition)? (yes/no) [default=no]: yes
Path to the existing block device: /dev/vda4
Would you like to connect to a MAAS server? (yes/no) [default=no]:
Would you like to create a new local network bridge? (yes/no) [default=yes]:
What should the new bridge be called? [default=lxdbr0]:
What IPv4 address should be used? (CIDR subnet notation, “auto” or “none”) [default=auto]:
What IPv6 address should be used? (CIDR subnet notation, “auto” or “none”) [default=auto]:
Would you like the LXD server to be available over the network? (yes/no) [default=no]: yes
Address to bind LXD to (not including port) [default=all]:
Port to bind LXD to [default=8443]:
Would you like stale cached images to be updated automatically? (yes/no) [default=yes]:
Would you like a YAML "lxd init" preseed to be printed? (yes/no) [default=no]:
- A storage pool, which is where containers will be stored
$ lvs
  LV          VG      Attr       LSize    Pool Origin Data%  Meta%
  LXDThinPool default twi-a-tz-- <125.75g             0.00   10.42
- A local network bridge, which is how containers will connect to the host / internet
$ brctl show
bridge name     bridge id               STP enabled     interfaces
lxdbr0          8000.00163eee4b9a       no
Working with LXD in a Browser
So for some strange reason, we need to explicitly enable the browser User Interface with;$ snap set lxd ui.enable=true
$ systemctl reload snap.lxd.daemon


Creating Containers
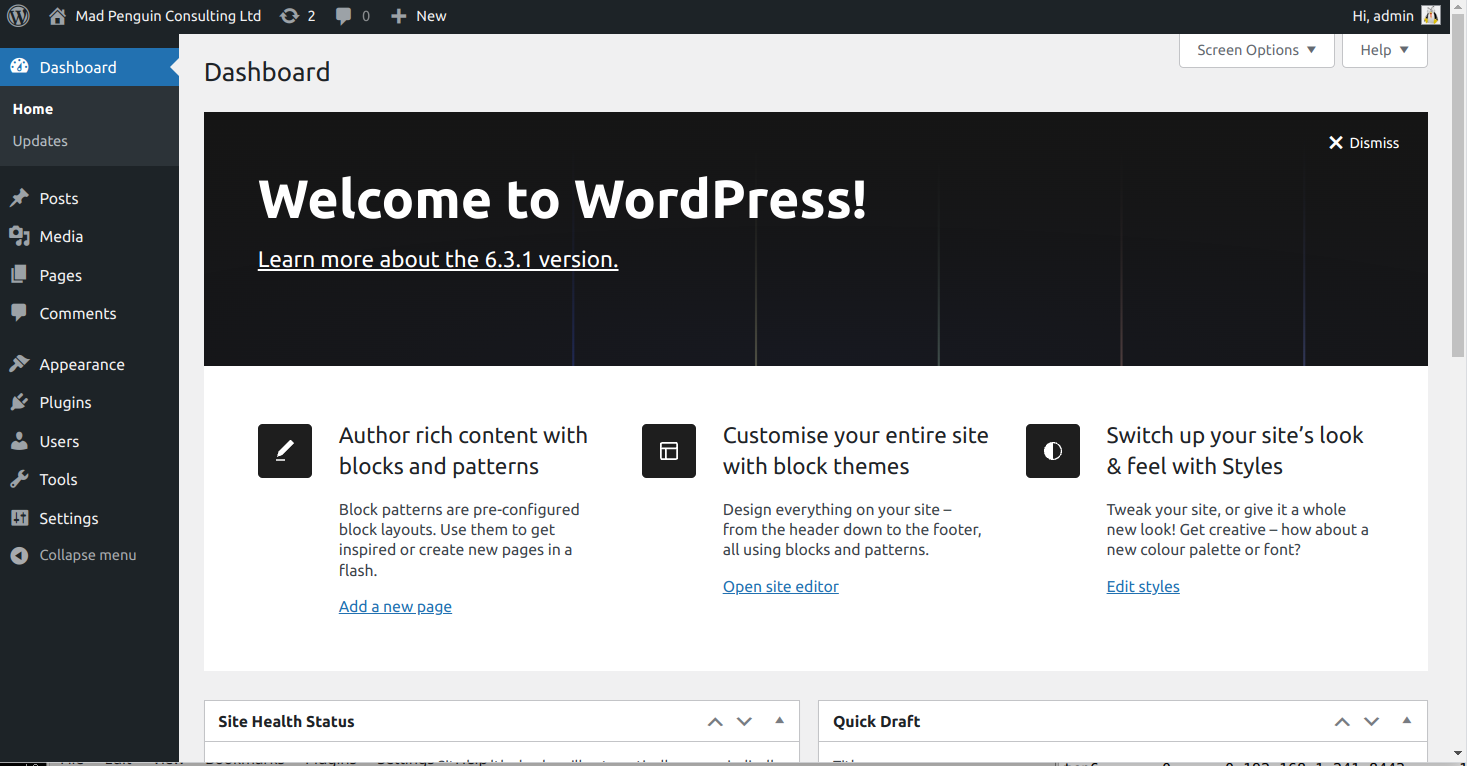
As I said initially, I’m doing this to host WordPress instances, so next we’re going to try to create some containers running Ubuntu Server into which I can install Wordpress.My first container
So, clicking on Create prompts with a create instance form. In this instance I’m going to call it madpenguin. At this point I need to specify what sort of base image I’m going to use. Typically I can pick from a number of Linux variants by clicking on Browse.


Container Storage
So the first relatively obvious issue is that 10G isn’t going to go very far. If we take a look at storage pools on the menu, we see the pool we set up earlier.

$ df -h
Filesystem                          Size  Used Avail Use% Mounted on
/dev/default/containers_madpenguin   23G  633M   22G   3% /
Storage Performance
The next question I have is, but how fast is it? Well in terms of code actually running, it should be > 95% of the speed outside the container, so there is very little loss. In terms of diskIO, which is the usual suspect when looking to bottlenecks, I installed fio and ran a basic test. Now, there will be lots of caching in play here, so treat this as you would any statistic, but as a general indicator;$ fio --name=read_throughput --directory=fio --numjobs=16 --size=1G \
--time_based --runtime=60s --ramp_time=2s --ioengine=libaio \
--direct=1 --verify=0 --bs=1M --iodepth=64 --rw=read \
--group_reporting=1 \
--iodepth_batch_submit=64 --iodepth_batch_complete_max=64
# From the summary;
Run status group 0 (all jobs):
   READ: bw=2309MiB/s (2421MB/s), 2309MiB/s-2309MiB/s (2421MB/s-2421MB/s)
         io=136GiB (146GB), run=60500-60500msec

Disk stats (read/write):
    vda: ios=140711/17, merge=2195689/13, ticks=60273445/7589
         in_queue=60282625, util=99.48%
Installing WordPress
So there are a few pre-requisites for Wordpress which I’ll install next, the main component that needs to be configured being nginx, which will be the Web Server.$ apt update
$ apt upgrade
$ apt install ghostscript mysql-server php php-bcmath php-curl php-imagick \
php-intl php-json php-mbstring php-mysql php-xml php-zip \
nginx php-fpm
Exposing ports inside containers
By default, the container is a part of a private network that’s not visible to the outside world, so initially I want to make it available on my local network. I can do this on the LXD control panel by going to Profiles and clicking Create Profile. In this instance I’m going to call it “webserver_443” and click on Create. This profile will inherit from default apart from the bit I’m now about to override. Going into configuration on the profile, I can click on YAML Configuration and then edit profile, then I need to paste in some configuration;name: webserver_443
description: Expose port 443 on the local network
devices:
port443:
listen: tcp:0.0.0.0:443
connect: tcp:127.0.0.1:443
type: proxy
config: {}
 Next I need to dump a WordPress zip file into the container;
$ wget https://wordpress.org/latest.zip
--2023-09-22 15:06:23--  https://wordpress.org/latest.zip
Saving to: ‘latest.zip’
latest.zip  100%[========================================>]  23.78M  6.40MB/s    in 4.3s
2023-09-22 15:06:28 (5.49 MB/s) - ‘latest.zip’ saved [24938800/24938800]
$ unzip latest.zip
$ mv wordpress/* .
$ rmdir wordpress
$ rm latest.zip
$ chown -R www-data:www-data .
- I need an entry in my local hosts file for the domain I want to install to. In this case I’m adding an entry to /etc/hosts for the IP address of my local server, with the name madpenguin.uk. (Wordpress is quite picky about installing onto a real name and doesn’t like changing it later)
- We need a MySQL account account to install to, so I’m going to add one via the MySQL shell;
mysql> create database wp_madpenguin;
Query OK, 1 row affected (0.00 sec)
mysql> create user madpenguin identified by 'secret_password';
Query OK, 0 rows affected (0.01 sec)
mysql> grant all on wp_madpenguin.* to 'madpenguin'@'%';
Query OK, 0 rows affected (0.01 sec)


Local WordPress meets World
So this isn’t always the best idea with regards to hosting sites on the end of a broadband connection, however so long as you don’t attract too much traffic you might be surprised.Cloudflare Zero Trust tunnels
As a great CloudFlare fan, I’m going to publish this container via a CloudFlare tunnel (this is all free-tier, I’m not using anything chargeable except a domain name). This involves me heading off to my CloudFlare control panel and setting up a new Tunnel. It’s a relatively (if not amazingly) straightforward process, I add a tunnel (in this case wp-demo), then save it away and we get a prompt for Operating System and architecture.