The https://linux.uk (and formerly https://linux.co.uk) website has been a dynamic website for many years, for the last 10+ running on Wordpress and before that on a platform called “Plone”. While on the one hand running on a dynamic platf...
The https://linux.uk (and formerly https://linux.co.uk) website has been a dynamic website for many years, for the last 10+ running on Wordpress and before that on a platform called “Plone”. While on the one hand running on a dynamic platform is great for flexibility and ease of use, when it comes to publishing content it can be a bit of a liability in terms of performance and security. Just to give this some context, generating the current home page can take maybe half a second, whereas serving a static copy of the generated page, maybe 1/1000th of a second (or less). Currently the site leans heavily on in-Wordpress caching, and asset caching provided by CloudFlare.
So as of today, whereas the Linux.uk website is generated by Wordpress, it will now be served up as static pages. i.e. there will be a statically generated version of the site which will be updated each time a change is made to the dynamic copy. Net result being a much faster website that’s more difficult to compromise.
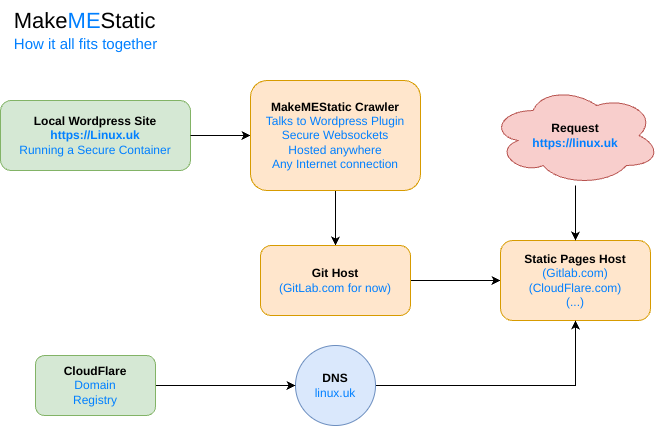
 So the Wordpress instance can run anywhere with an Internet connection, say a desktop machine (currently running in a container). The MakeMEStatic crawler is either a service or a self-hosted low-power Linux server (also currently running in a container). There are a number of Git providers with free-tier static hosting services (Gitlab, GitHub and CloudFlare to name three) and many (many) Domain registries. So essentially this can all be done, with the exception of the domain name hosting, using free-tier services.
What’s needed to complete the recipie
- The MakeMEStatic plugin for Wordpress
- A free account with GitLab
- A working domain name with a domain registrar (linux.uk in this instance)
The Process
- Create a repository for your pages in the Gitlab control panel
- Create a Gitlab access token in the Gitlab control panel
- Install the MakeMeStatic plugin from the Wordpress control panel
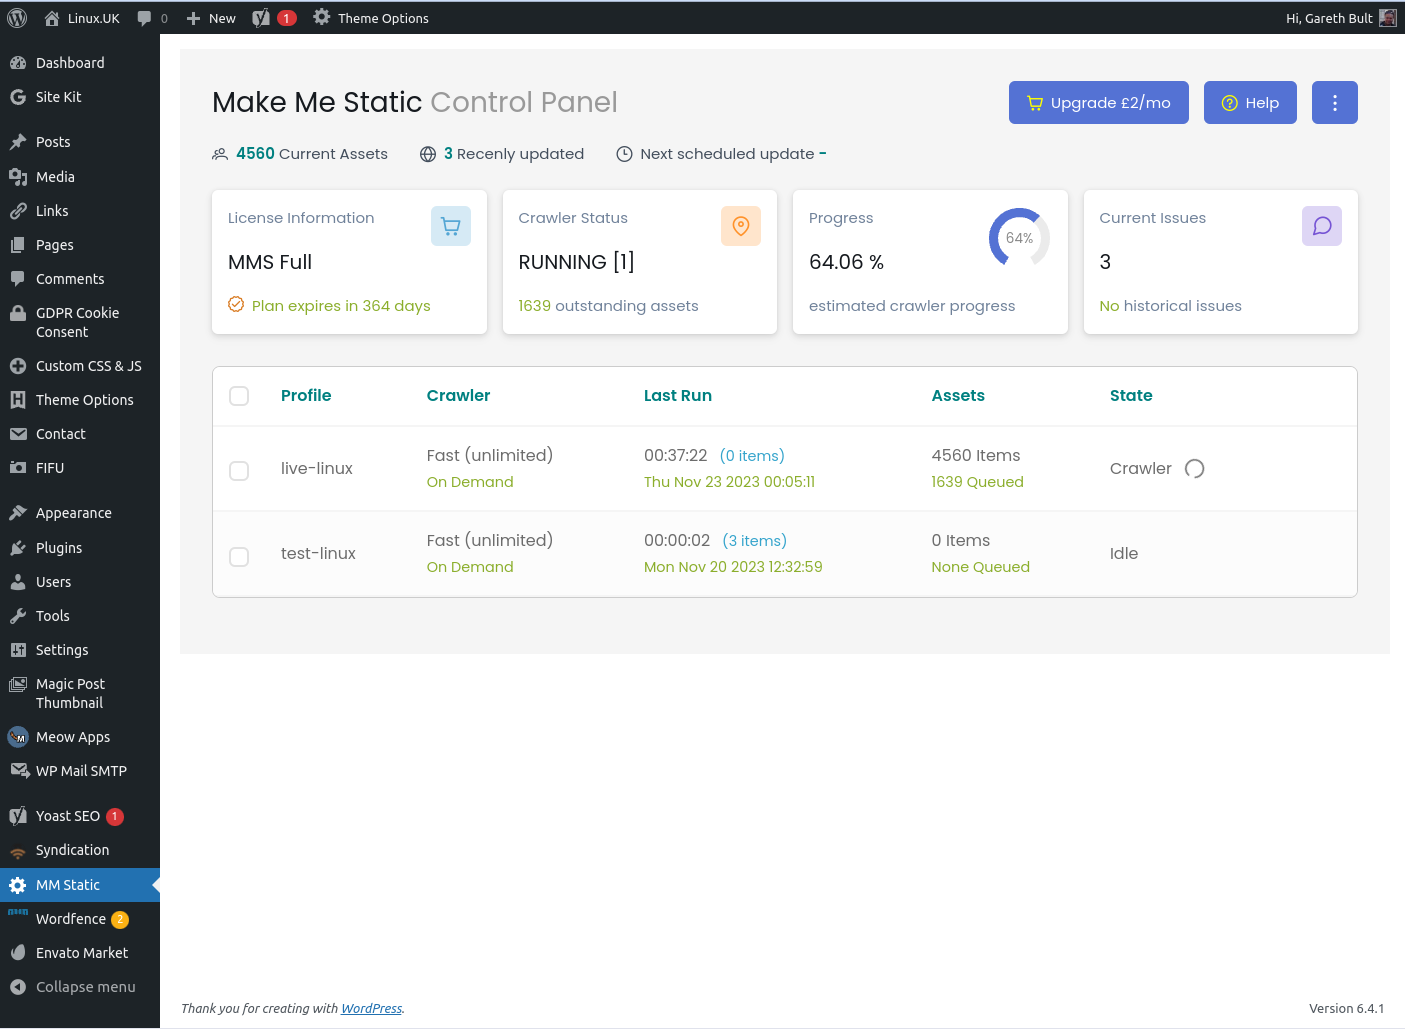
- Create a new instance in the MakeMEStatic admin panel
- Enter your real domain name
- Enter your Gitlab repository name
- Enter your access token
- Select and “Run” your profile, this will crawl your site storing the resulting static copies in your selected GitLab repository.
- In your GitLab control panel, in Settings → General, change the “Pages” “Visibility” to everyone
- In your GitLab control panel, in Deploy → Pages and add your domain name
- Add the TXT record to your DNS as described by the GitLab control panel
- Re-point your domain to the GitLab URL described by the GitLab control panel


